Installing Getbhavcopy
13 Feb 2017
Getbhavcopy is a FREE NSE and BSE ‘End of Day’ data downloader. This post explains the steps to Install and Configure Getbhavcopy.
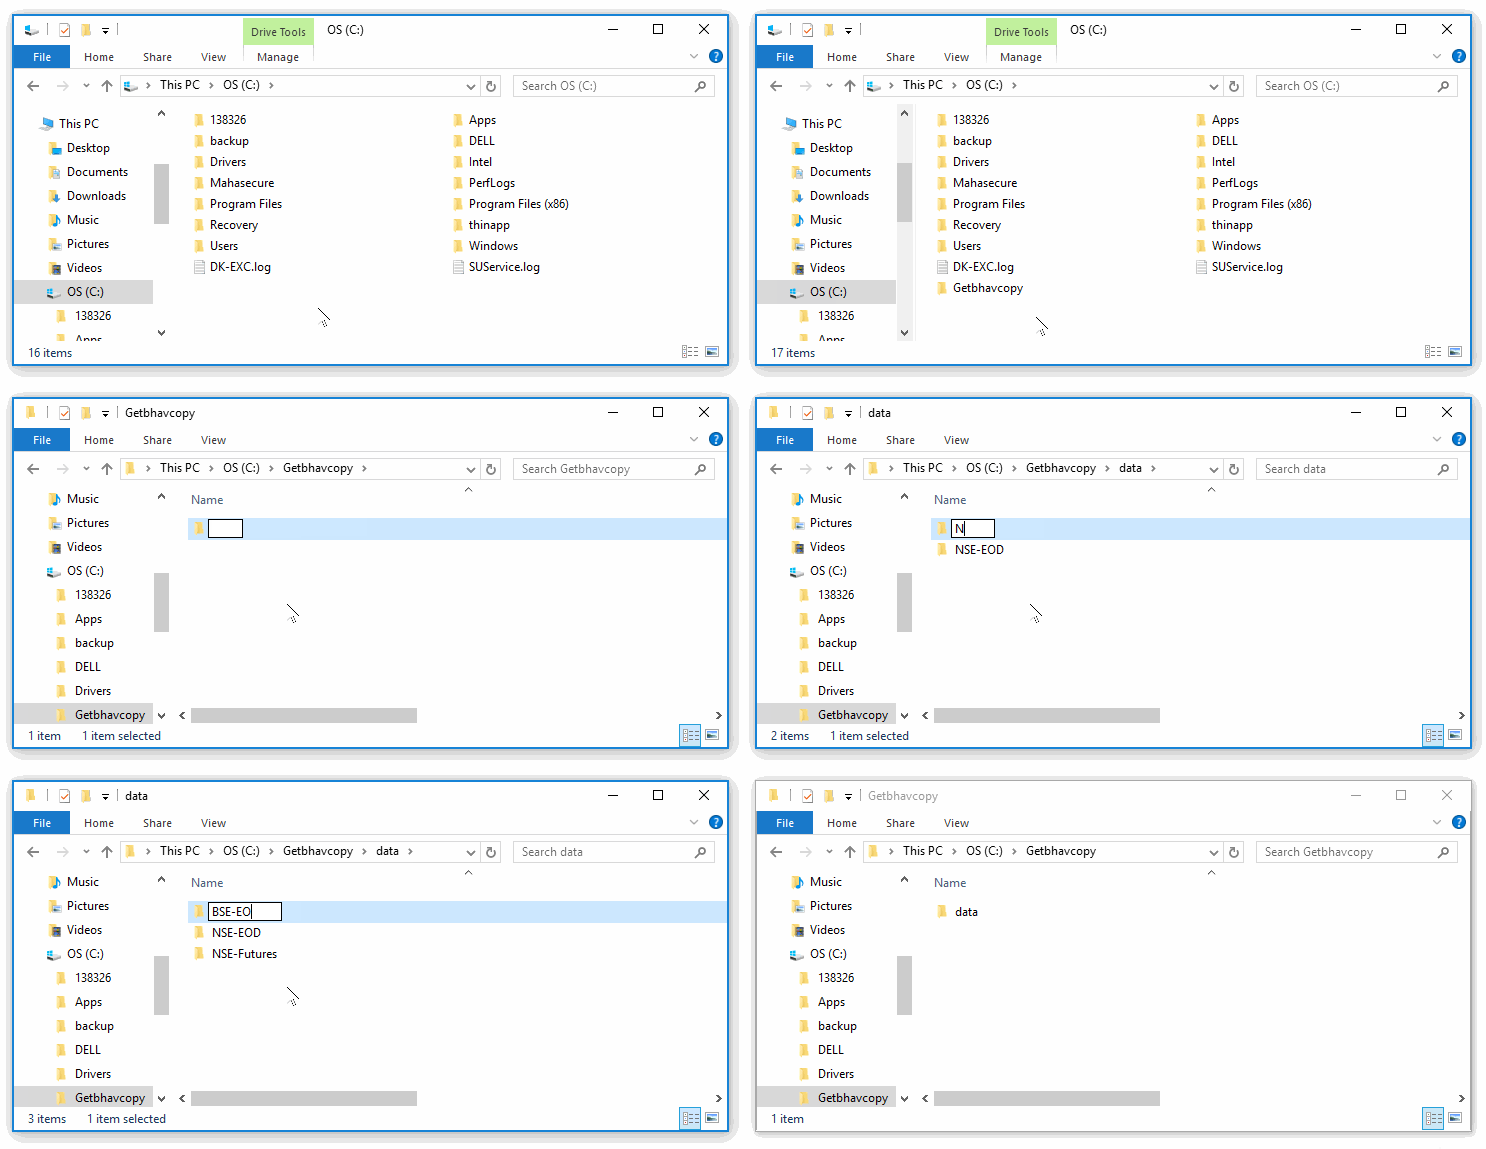
Download directories
Throughout the Documentation, I assume that
C:\Getbhavcopyis your Getbhavcopy installation directory, i.e. the one containing Getbhavcopy.exeC:\Getbhavcopy\data\NSE-EODis your NSE Equity and Indices data download directory.C:\Getbhavcopy\data\NSE-Futuresis your NSE Futures data download directory, andC:\Getbhavcopy\data\BSE-EODis your BSE Equity and Indices data download directory.

.Net Framework dependency
Starting version 2.1.4a, Getbhavcopy requires .Net Framework 4.0 to be installed for it to work. I recommend using the .Net Framework 4.0 standalone installer for the same.
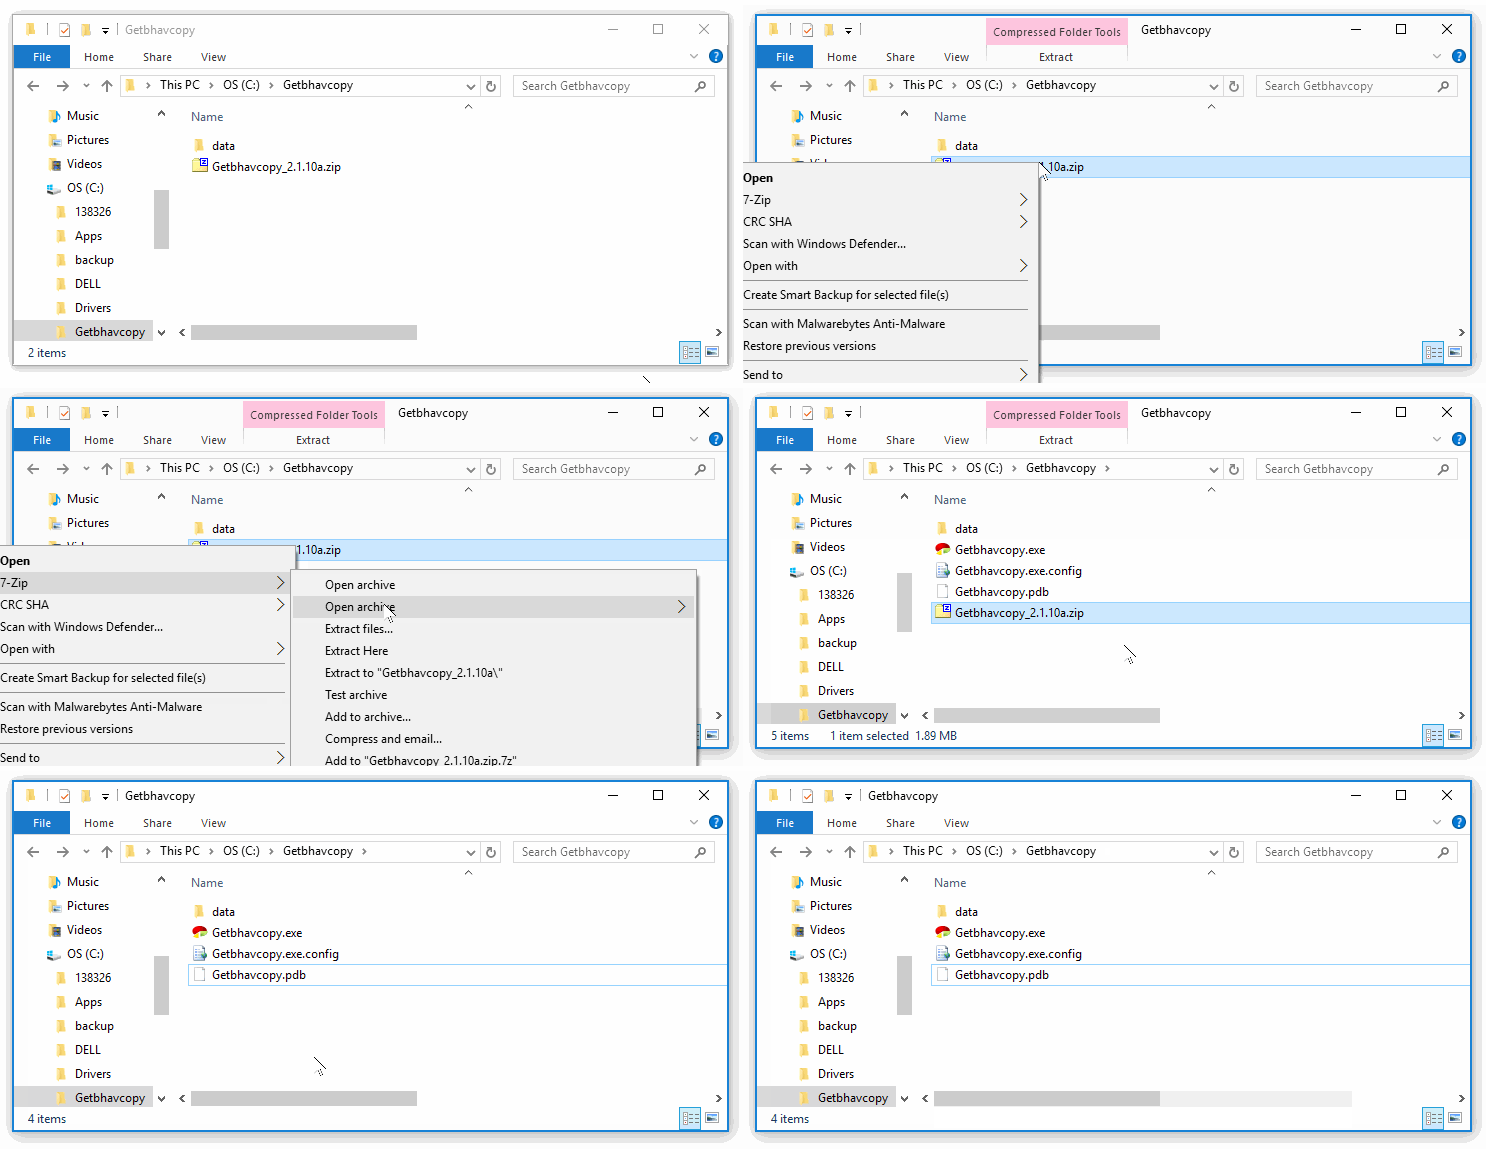
Download Getbhavcopy
Next download the latest version of Getbhavcopy from Getbhavcopy Download page. Getbhavcopy is distributed as a simple portable zip file. Download the zip file and extract it to C:\Getbhavcopy directory you created earlier.

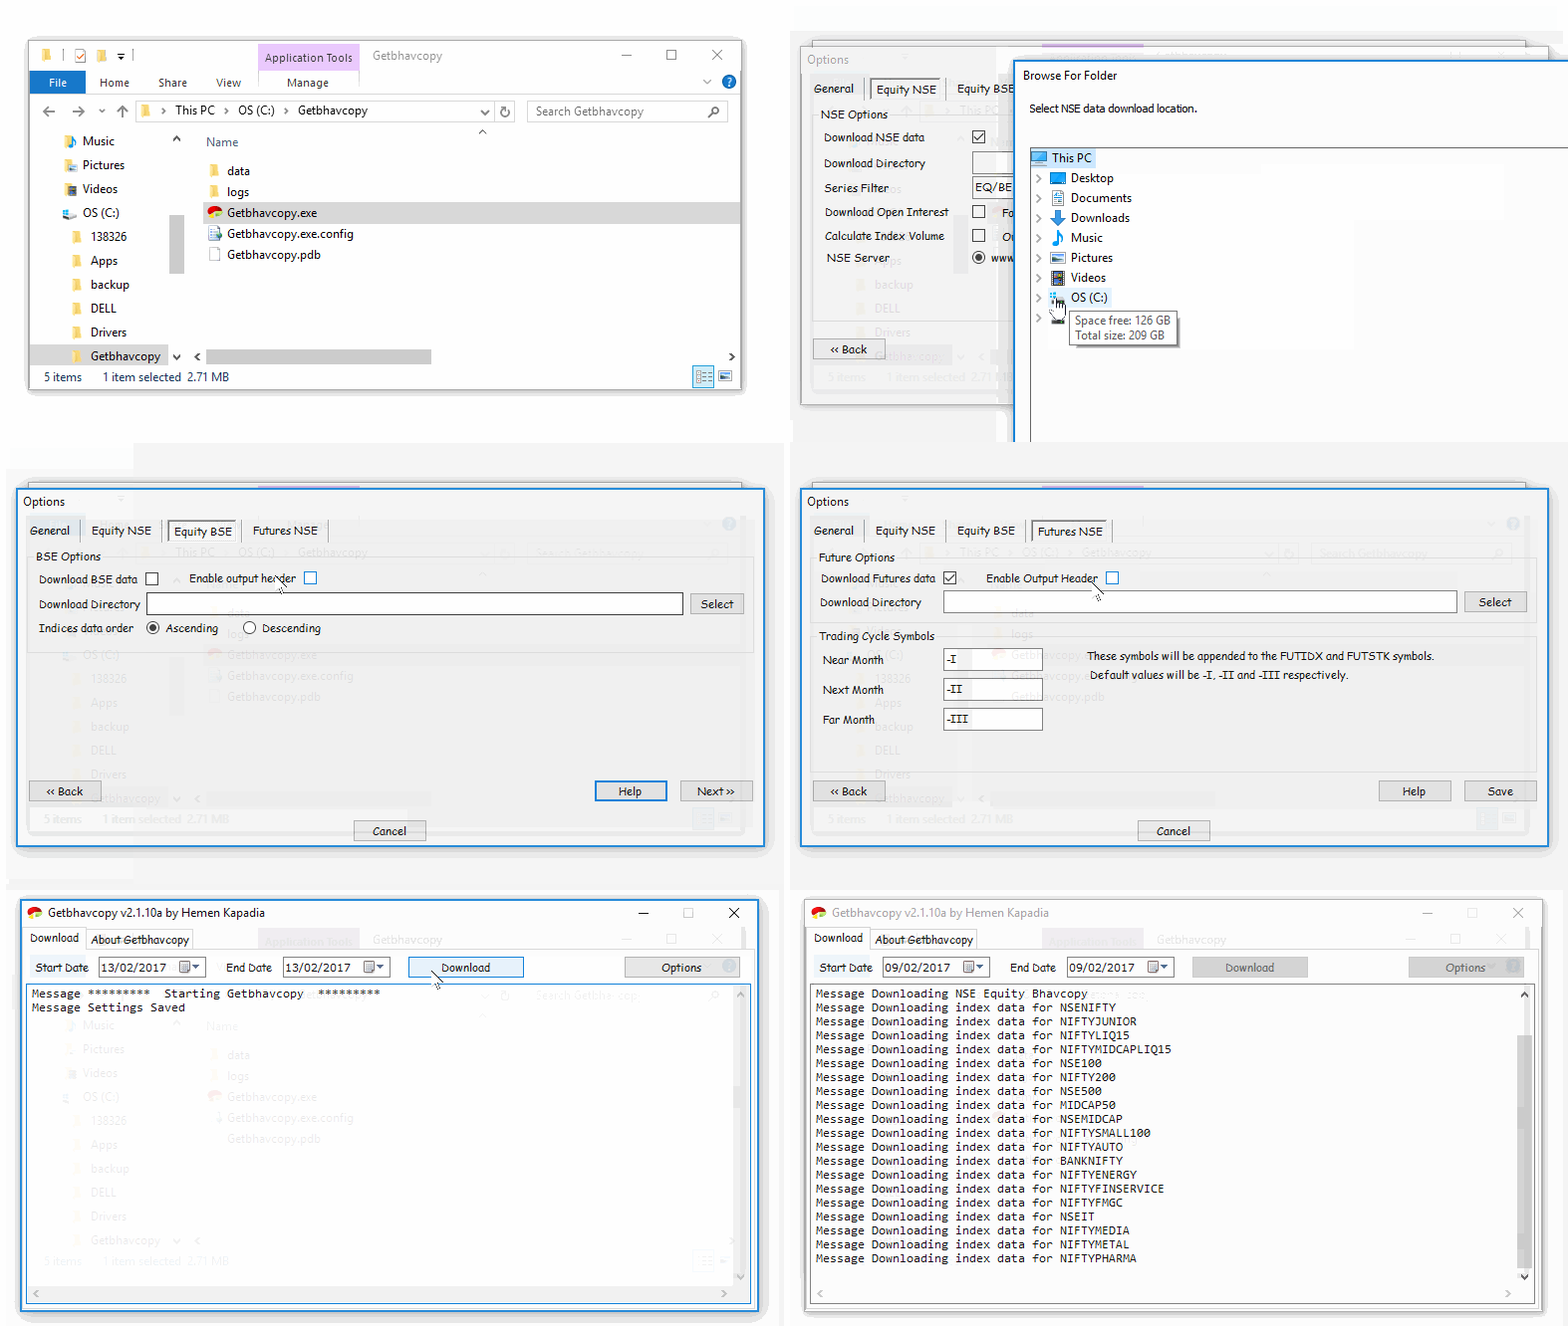
Configuring Getbhavcopy options
When you start Getbhavcopy for the very first time, you will notice that the date selections and the ‘Download’ button are disabled. This is because Getbhavcopy Options are not yet configured. Setup Getbhavcopy Options. Once the options are set, the date range selections and ‘Download’ buttons will be enabled, and you will be able to download bhavcopy data.

Hope this post helps you. Thanks for your continued support to Getbhavcopy.
Comments